GlowHands · User Manual
ADVPRO GlowHands LED Clock
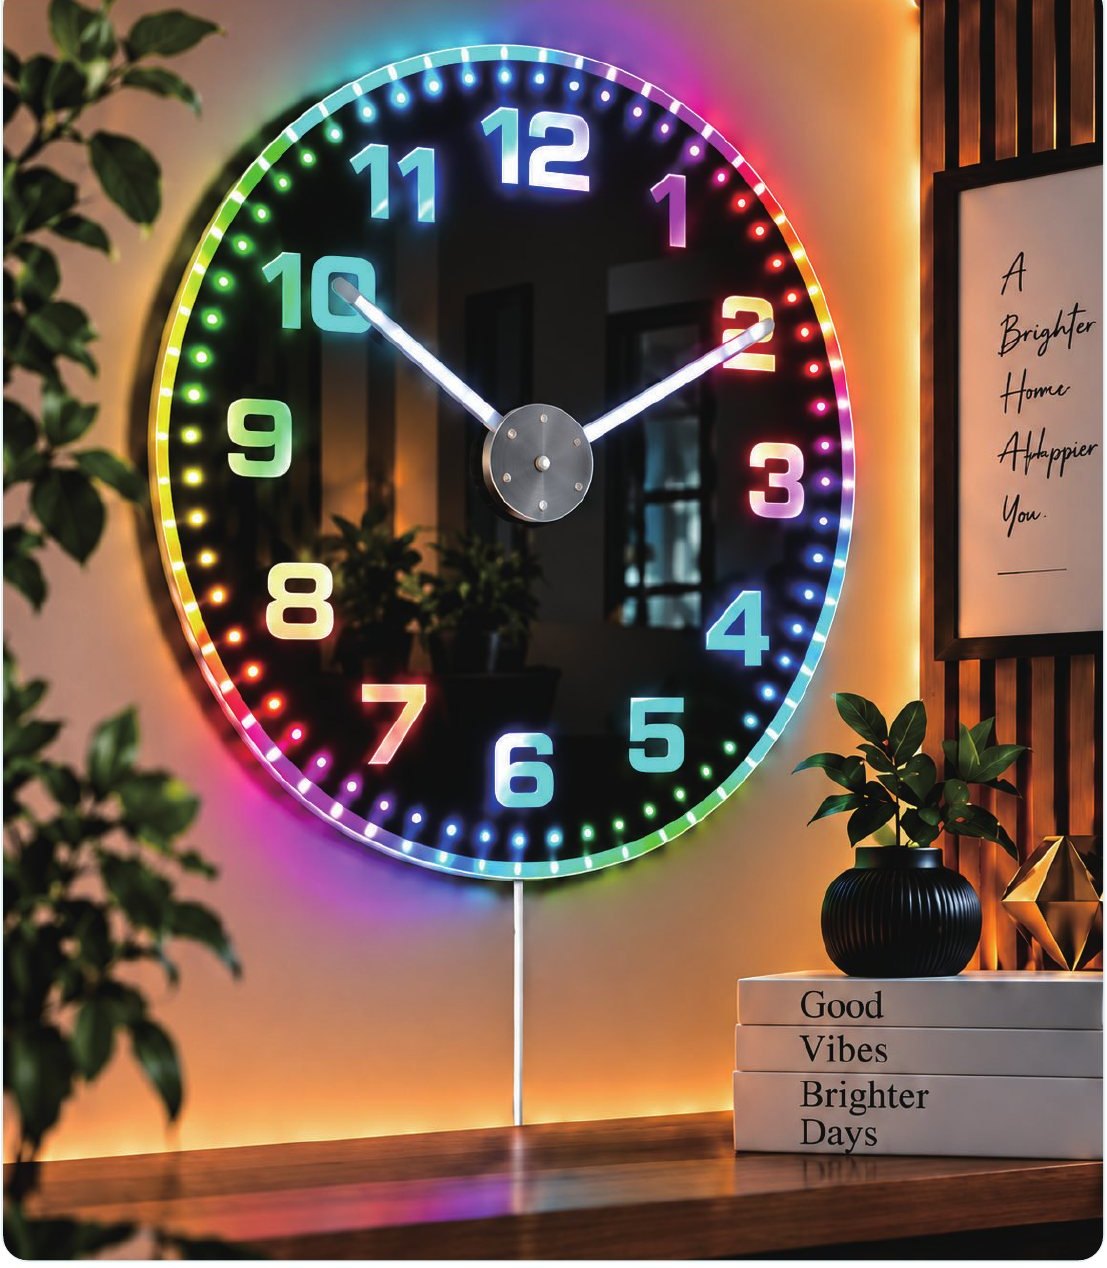
A mirrored LED wall clock with illuminated hands and fixed single-colour lighting alongside dynamic RGBIC perimeter lighting.
- Indoor use
- Mirrored face
- USB 5V lighting
Before you start
Please check the package contents before installation. We recommend wearing the included gloves when handling the clock to avoid fingerprints on the mirrored surface.
In the box
- GlowHands clock (×1)
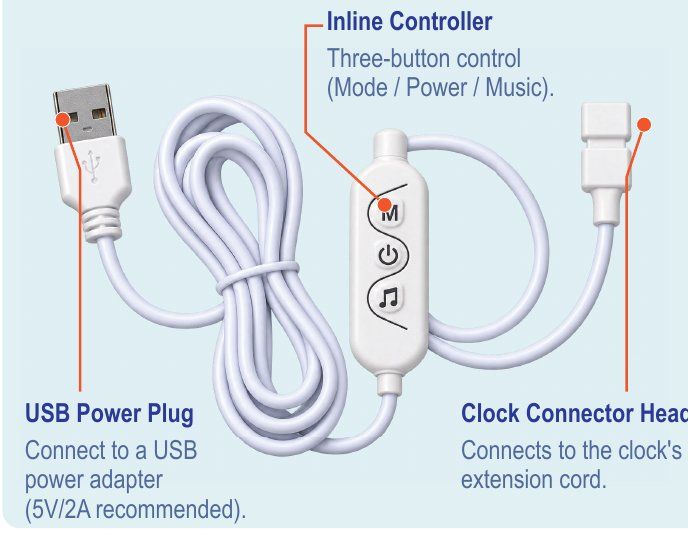
- USB power cable with inline controller (×1)
- Gloves (×1 pair)
- Wall plugs (×2)
- Operation manual (×1)
- Remote controller (optional)
- USB plug (optional)
What is not included
- 1 × AA battery for the clock movement
- USB power adapter, 5V/2A recommended — unless included as the optional USB plug
- Special screws for some wall types

Key features
- Mirrored acrylic surfaceSleek, premium look with a reflective finish.
- Continuously illuminated handsCold-white hands stay lit whenever USB power is connected.
- RGBIC dial lighting200+ dynamic lighting modes.
- Flexible controlMobile app or the included inline controller.
- Dual power systemAA battery keeps time; USB powers lighting and smart functions.
- Music sync modeLights dance to the rhythm of your music.
Product overview

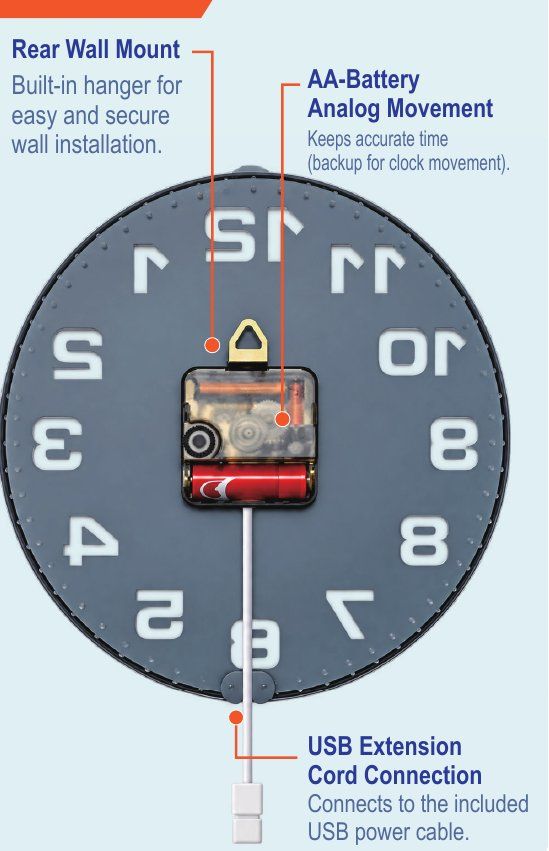
Tap a part to see what it does.
Dual power system
AA battery for timekeeping
A single AA battery keeps the analog movement accurate even when the decorative lighting is switched off.
USB power for lighting
USB power runs the RGBIC dial lighting, the illuminated hands and all smart functions (mode switching, music sync, etc.).
Setup & Installation
Get up and running in four steps. Tick each step as you go.
0 of 4 steps done
- 1
Insert AA battery & set the time
Insert one AA battery into the clock movement and set the time. We recommend using your finger to move the minute hand – it must be moved clockwise only.
- 2
Mount the clock on the wall
Standard screws are included to mount the clock on the wall. Special screws (not included) may be required depending on the wall type.
- 3
Connect the cable correctly
Plug the USB cable’s special connector end into the clock’s extension cord (from the bottom of the clock), then connect the USB plug to a USB wall adapter.
- 4
Download the app
Scan the QR code below or on the back of the inline controller to download the duoCo StripX app and unlock all smart features.

Inline controller
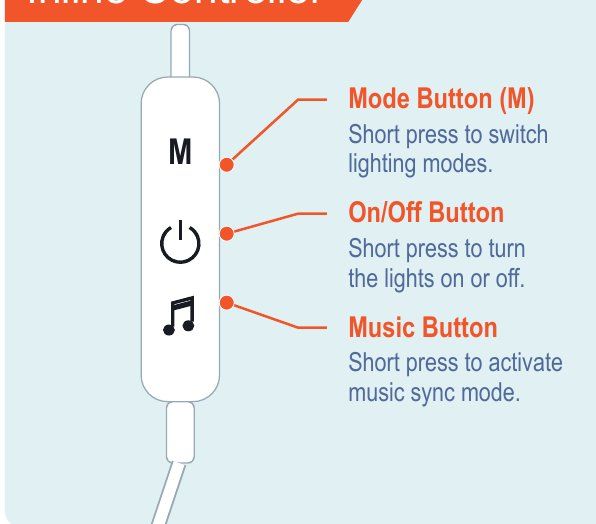
- M – Mode buttonShort press to switch lighting modes.
- ⏻ – On/Off buttonShort press to turn the lights on or off.
- ♫ – Music buttonShort press to activate music sync mode.
App Control (duoCo StripX)
Control the RGBIC dial lighting with the duoCo StripX app, available for iOS and Android.
Before you start
Power on – make sure the clock is connected to USB power and turned on. Enable Bluetooth on your phone. Allow location access – on Android, location permission is required to scan for nearby devices.
Step-by-step pairing
- Connect power – plug the included USB cable into the clock and a power source.
- Download the app – search “duoCo StripX” in the App Store or Google Play, or scan the QR code.
- Enable permissions – turn on Bluetooth and allow location access (if required).
- Open the app – launch duoCo StripX with Bluetooth on and stay near the clock.
- Select & pair – tap the device name to connect. Once paired, you can control the clock with the app.

iPhone (iOS)
Bluetooth permission is usually enabled automatically. If the device is not found, try restarting Bluetooth or the app.
Android
Location permission is required – choose “While using the app” when prompted. If the device is still not found, make sure location services are on in your phone settings.
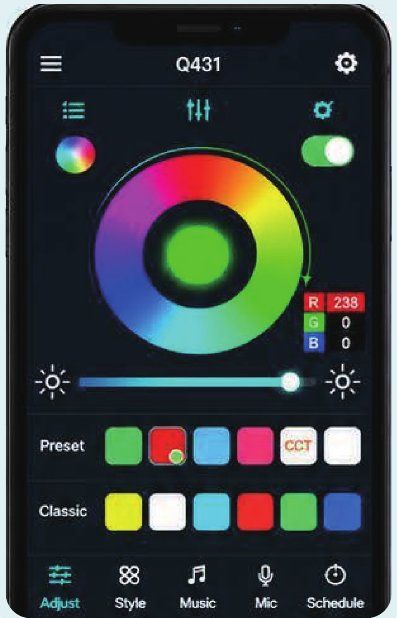
Colour selection – choose from millions of colours, adjust saturation and brightness, or pick preset colours. Brightness control – match the dial lighting to any environment. Lighting control – turn the light on or off, switch lighting modes and customise the colour style.


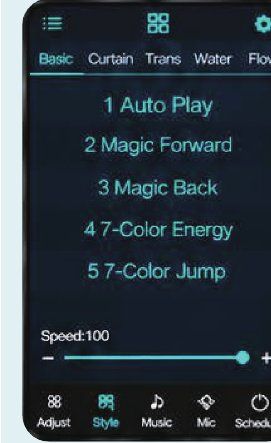
Choose from 200+ predefined dynamic modes. You can adjust the speed and direction of each mode to match your style.

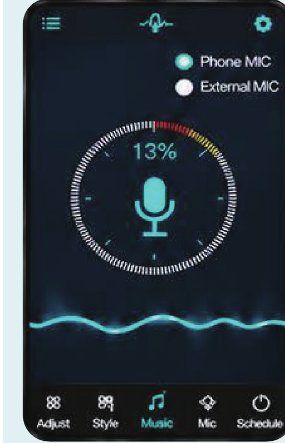
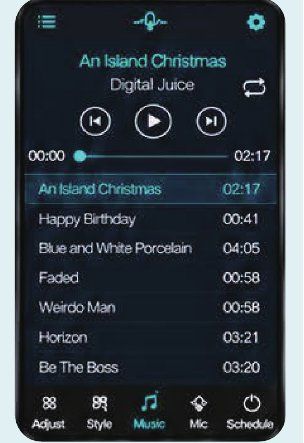
Let the lights move with your music. Choose built-in music modes, use the phone microphone to detect sound, or play music directly from your device. Works best with clear audio; results may vary with your phone’s microphone.
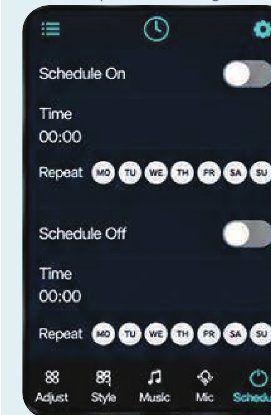
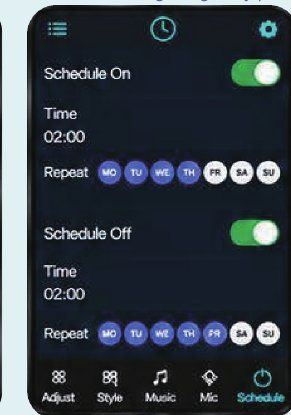
Set timers to turn the RGBIC dial lighting on or off automatically. You can schedule multiple timers to fit your daily routine. Timer settings affect the dial lighting only.
Fine-tune your lighting with advanced options such as shake control, RGB sequence and pixel count.


Care & Troubleshooting
Care & handling
- Wear glovesAvoid fingerprints on the mirrored surface.
- Clean gentlyUse a soft, dry microfiber cloth.
- Avoid harsh chemicalsNo alcohol, ammonia or abrasive cleaners.
- Indoor use onlyKeep away from moisture, extreme heat and direct sunlight.
- Keep USB connection dryKeep the cable and controller away from water or other liquids.
Troubleshooting
Tap a problem to see the fix.
Lights do not turn on
- Make sure the USB power cable is securely connected.
- Try a different USB power adapter (5V/2A or higher).
- Check that the inline controller is properly connected.
Clock does not keep time
- Check the AA battery polarity and condition.
- Reset the time using the clock movement – app controls affect lighting only.
App cannot find the device
- Make sure the clock is powered on and the LED lights are lit.
- Make sure Bluetooth is enabled on your phone; on Android, allow location permission.
- Move closer to the clock and avoid obstacles.
- Turn Bluetooth off and on again, or close and reopen the app.
- If the issue persists, restart your phone and the clock, then pair again.
Remote control not responding
- Check that the battery is installed correctly.
- Try replacing the battery with a new one.
- Stay within range and point the remote toward the clock.
Clock surface shows fingerprints
- Use the included gloves when handling the clock.
- Clean gently with a soft, dry microfiber cloth.
- Avoid touching the mirrored surface directly.
Need help?
Contact ADVPRO support
If you have any questions or issues with your ADVPRO GlowHands, please contact us and include a photo or short video of the issue. Thank you for choosing ADVPRO!